Planning & Preparation!
Timing
Prior to an astrophotographer even setting up
the telescope for deep space images, he/she will need
to plan exactly what deep space objects will be photographed
that night. This is because different deep space objects
appear at different times throughout the night. The stars
overhead completely change their positions in as little
as an hour. This is due to the Earth's rotation. So planning
what objects will be up first, and where they are
is essential for an effective night of Astrophotography.
New Moon
But there is another reason for planning the night
well in advance.
Deep space objects can only really
be photographed on the night of the new moon
(no moon, which is once a month). Moonlight "cancels out"
the dim light from deep space objects. Only getting
one night a month to take these types of
photos, forces the astrophotographer to become a
meticulous planner.
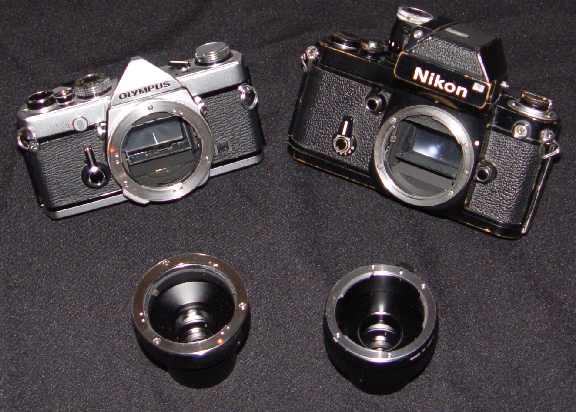
Emulsions
Another factor to consider in astrophotography, is the type
of film used. Different films are sensitive to different colours.
So an astrophotographer needs to adjust the type of
photographic film being used for each individual image. This
knowledge comes from the classic trial and error
routine.
Predicting Weather
Predicting atmospheric turbulence and knowing
the weather is also a must. Obviously learning meteorology
is extremely important for an astrophotographer.
I use the Australian Bereau of Meteorology's
web site for this.
http://www.bom.gov.au/weather/wa/
Scintillation
Scintillation is what you are seeing when the stars
appear to twinkle. Scintillation is bad
for astrophotographer's, because it means
the atmosphere is unstable. An unstable atmosphere
may not look like much of a problem to the naked
eye, but through a high powered telescope, the stars
wobble haphazardly, and this is obviously not good
for imaging. So learning meteorology and keeping
up to date with jet streams, by using satellite
images is a must. I use the following links to monitor
jet stream activity in the upper atmosphere.
http://squall.sfsu.edu/crws/jetstream.html
http://www.wunderground.com/global/Region/AU/JetStream.html
Flight Paths
Also, if you are close to a flight path
checking up on local flights is a must.
A jet with bright lights streaking through a one
hour exposure would not be helpful. See picture below.

I took my eyes off the sky for five seconds here, and
a 707 decides that it is not camera shy, ruining my 30 minute
exposure.
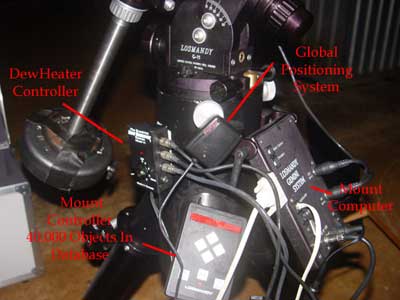
Satellite Tracking Software
Also having a satellite streak through
your photo would not be helpful,
so I use commercially available astronomy software
to monitor satellites. Whilst conducting long exposure
photography, I have my laptop sitting near me
running software showing me real time movement
of Earth's artificial satellites. I keep a close eye
on this during an exposure.
The occasional satellite that passes overhead
which is not on my astro-software is usually
a spy satellite or space junk.
Satellites that appear to blink on and off
as they travel through the sky are
classified as detatched satellites which
are decomissioned satellites
that are simply tumbling around
in orbit.
Recapping
So after the astrophotographer has
Checked the weather and jet streams
and waited for the new moon, and also
collimated his scope
polar aligned his scope
calibrated his guidescope
selected the right film
found the object to be imaged
focused the image
then framed the image
the exposure is close to starting. But not quite yet.
When using the cable release to open the camera's
shutter. The movement of the mirror flipping upward,
inside the camera, vibrates the telescope enough to ruin
the photo.So an artificial shutter must be used to avoid
this problem. Which won't be covered here.
Now a lengthy guided exposure can start.
The reason an astrophotographer uses different exposures times
for different objects, is that the object's magnitudes (brightness)
vary from moderately bright, to extremely faint.
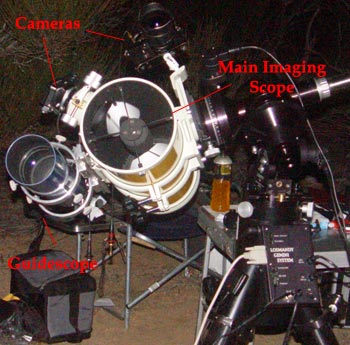
Astrophotography is the culmination of two
demanding disciplines: Astronomy and Photography.
It is easily the most technically demanding form of
photography today.
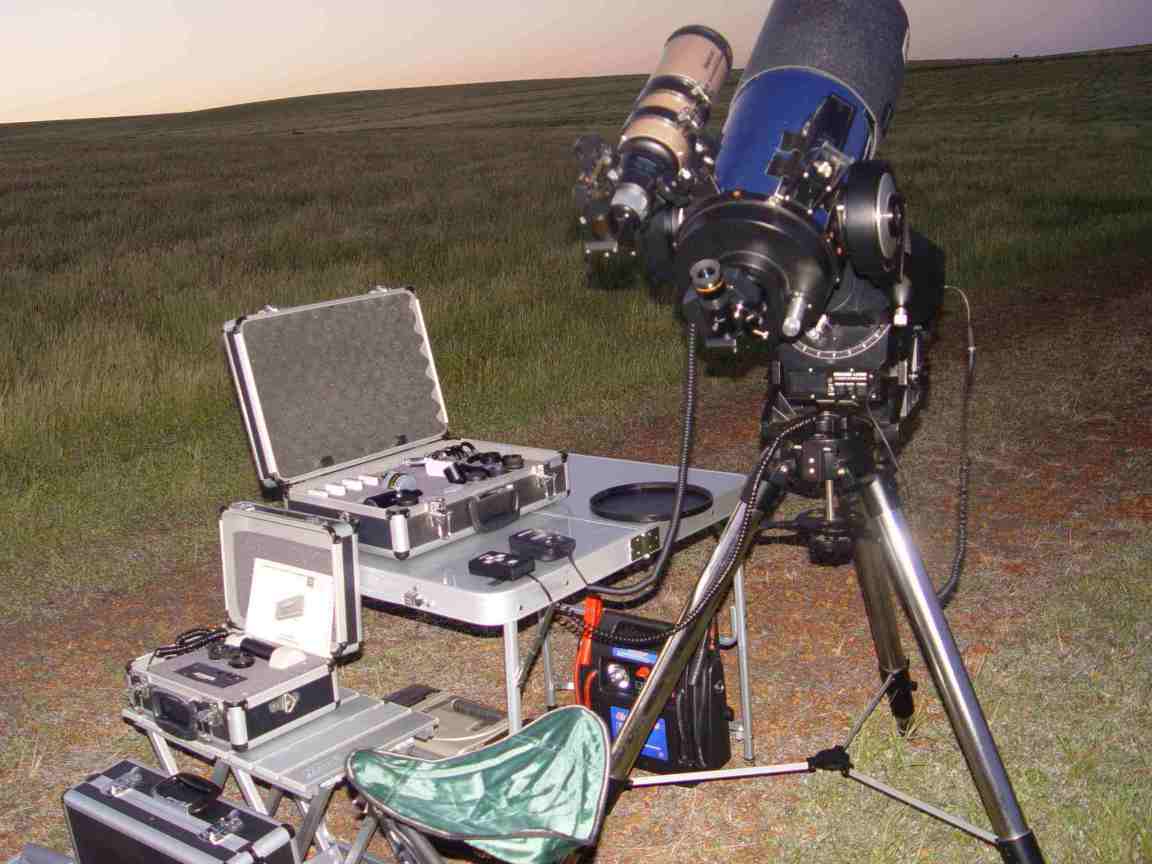
You have to be a fanatic for this type of photography.
Because after lugging
all your heavy equipment out to the country
and spending hours setting it all up, you
end up sitting in total darkness
in freezing conditions for hours on end, uncomfortably
huddled over a guiding eyepiece.
It is not most people's idea of
an exciting night, but the challenge and
difficulty in taming these
objects is what drives me.
Many other techniques and gadgets are used for this form
of photography. This has simply been a brief
overview of the field (phew).
Ray Palmer
Deep Space Photographer
Return to top of page?